Push notifications
How to create and manage push notification campaigns in the Zeta Marketing Platform (ZMP).
This guide covers creating push notification campaigns in ZMP — from choosing the right campaign type and personalizing the message, to targeting the right audience and measuring delivery and engagement across iOS and Android.
On this page
- What you can do with push notifications
- Before you begin
- Choosing a campaign type
- Composing the notification
- Platform-specific settings
- Audience targeting
- Launch settings
- Advanced options
- Previewing your notification
- Monitoring delivery
What you can do with push notifications
Push notifications are messages delivered by the device's operating system that appear on the lock screen, in banners, and in the notification center — even when your app is not open. Because they reach users outside of an active app session, push is one of your most direct channels for timely, high-visibility communication.
- Re-engage users — bring lapsed users back with win-back campaigns, abandoned cart reminders, or offers triggered by inactivity.
- Drive conversions — promote flash sales, time-limited discounts, new product launches, or personalized recommendations at the right moment.
- Deliver timely updates — send order confirmations, shipping alerts, appointment reminders, and personalized milestone messages when they matter most.
You can use push independently or combine it with email, in-app messages, and app inbox as part of a multi-channel campaign in ZMP.
Before you begin
Before you can send push notifications, verify the following:
- Your app is registered in ZMP with valid push credentials. See Mobile app registration.
- Your development team has integrated the SDK's push notification handling. See the Developer Guides for platform-specific instructions.
- Your target users have granted notification permission on their devices.
Choosing a campaign type
ZMP supports two ways to send push notifications. Choose based on whether you want to send to a segment at a controlled time, or trigger a send automatically in response to user behavior.
Broadcast Campaign
Send a single notification to an audience segment, either immediately or at a scheduled time. Best for promotions, newsletters, product announcements, and any campaign where you control the send timing.
- Navigate to Campaigns > Broadcast from the left-hand menu.
- Click Create Campaign. Enter a campaign name and click Next.
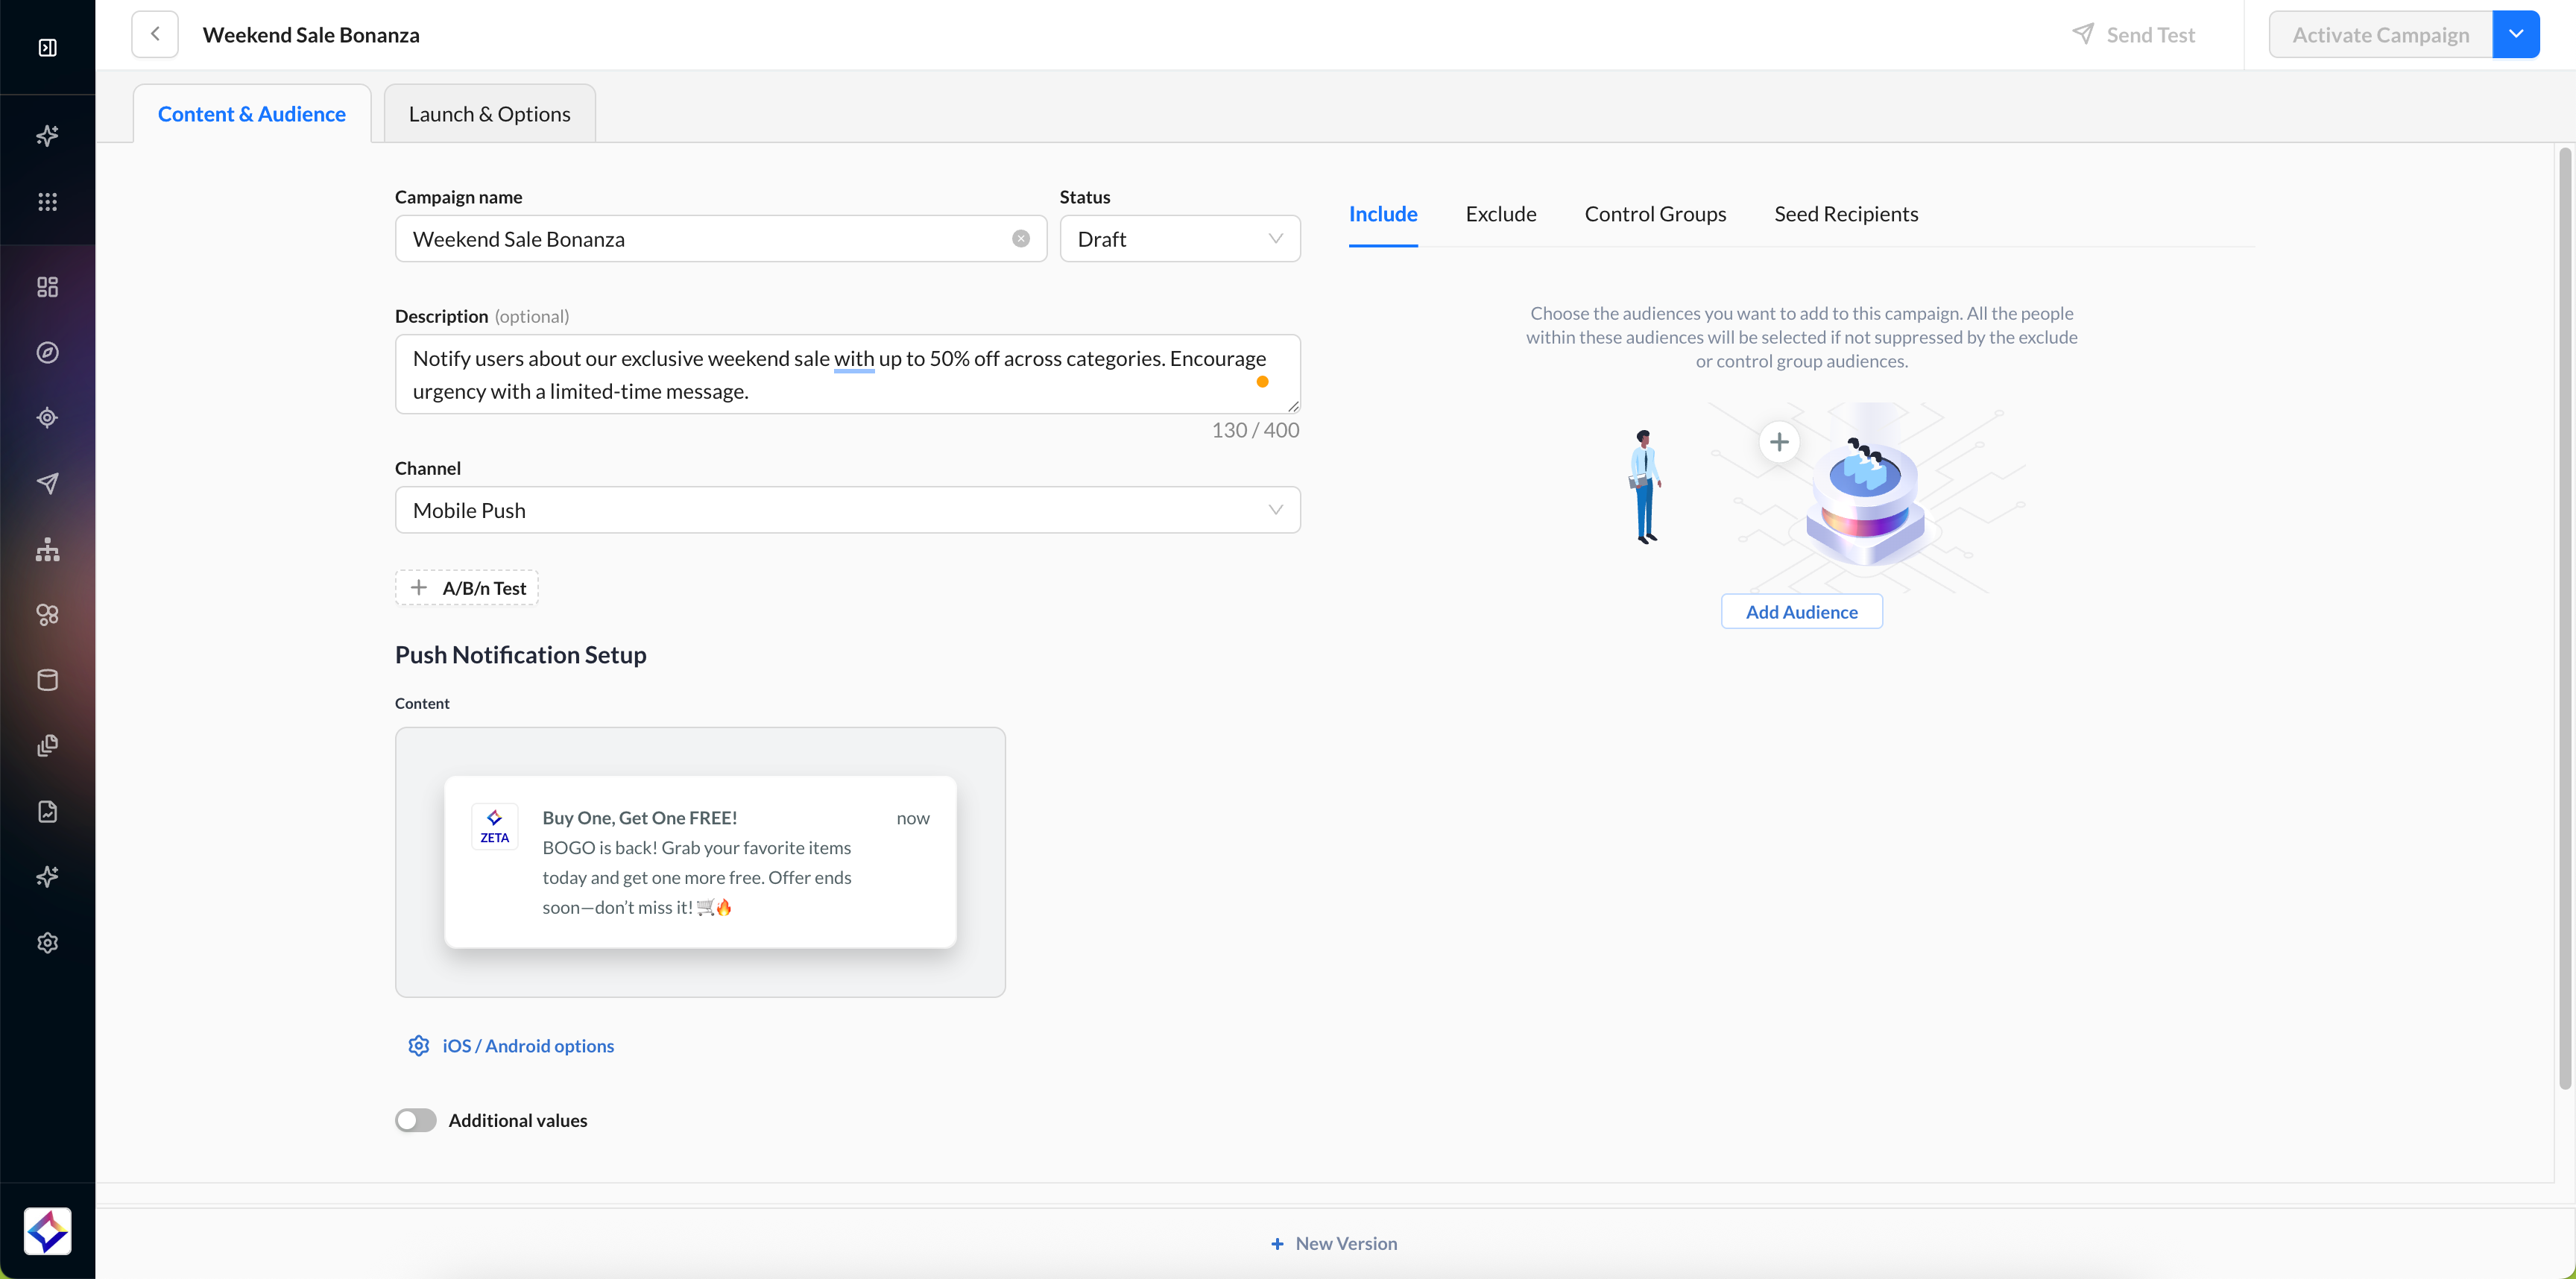
- Within the Content & Audience tab, choose Mobile Push from the channel dropdown.
For full setup instructions, see Broadcast Campaigns in the Zeta knowledgebase.
Triggered Campaign
Trigger push notifications automatically in real time based on user behavior. Best for cart abandonment, post-purchase follow-ups, win-back campaigns, and any send where timing depends on what the user does. Triggered campaigns are configured using Experience Builder.
- Navigate to Experiences > Builder from the left-hand menu.
- Click New Experience to create a new triggered journey.
- Add a Mobile Push step to your journey and configure the trigger.
For full setup instructions, see Experience Builder in the Zeta knowledgebase.
Composing the notification
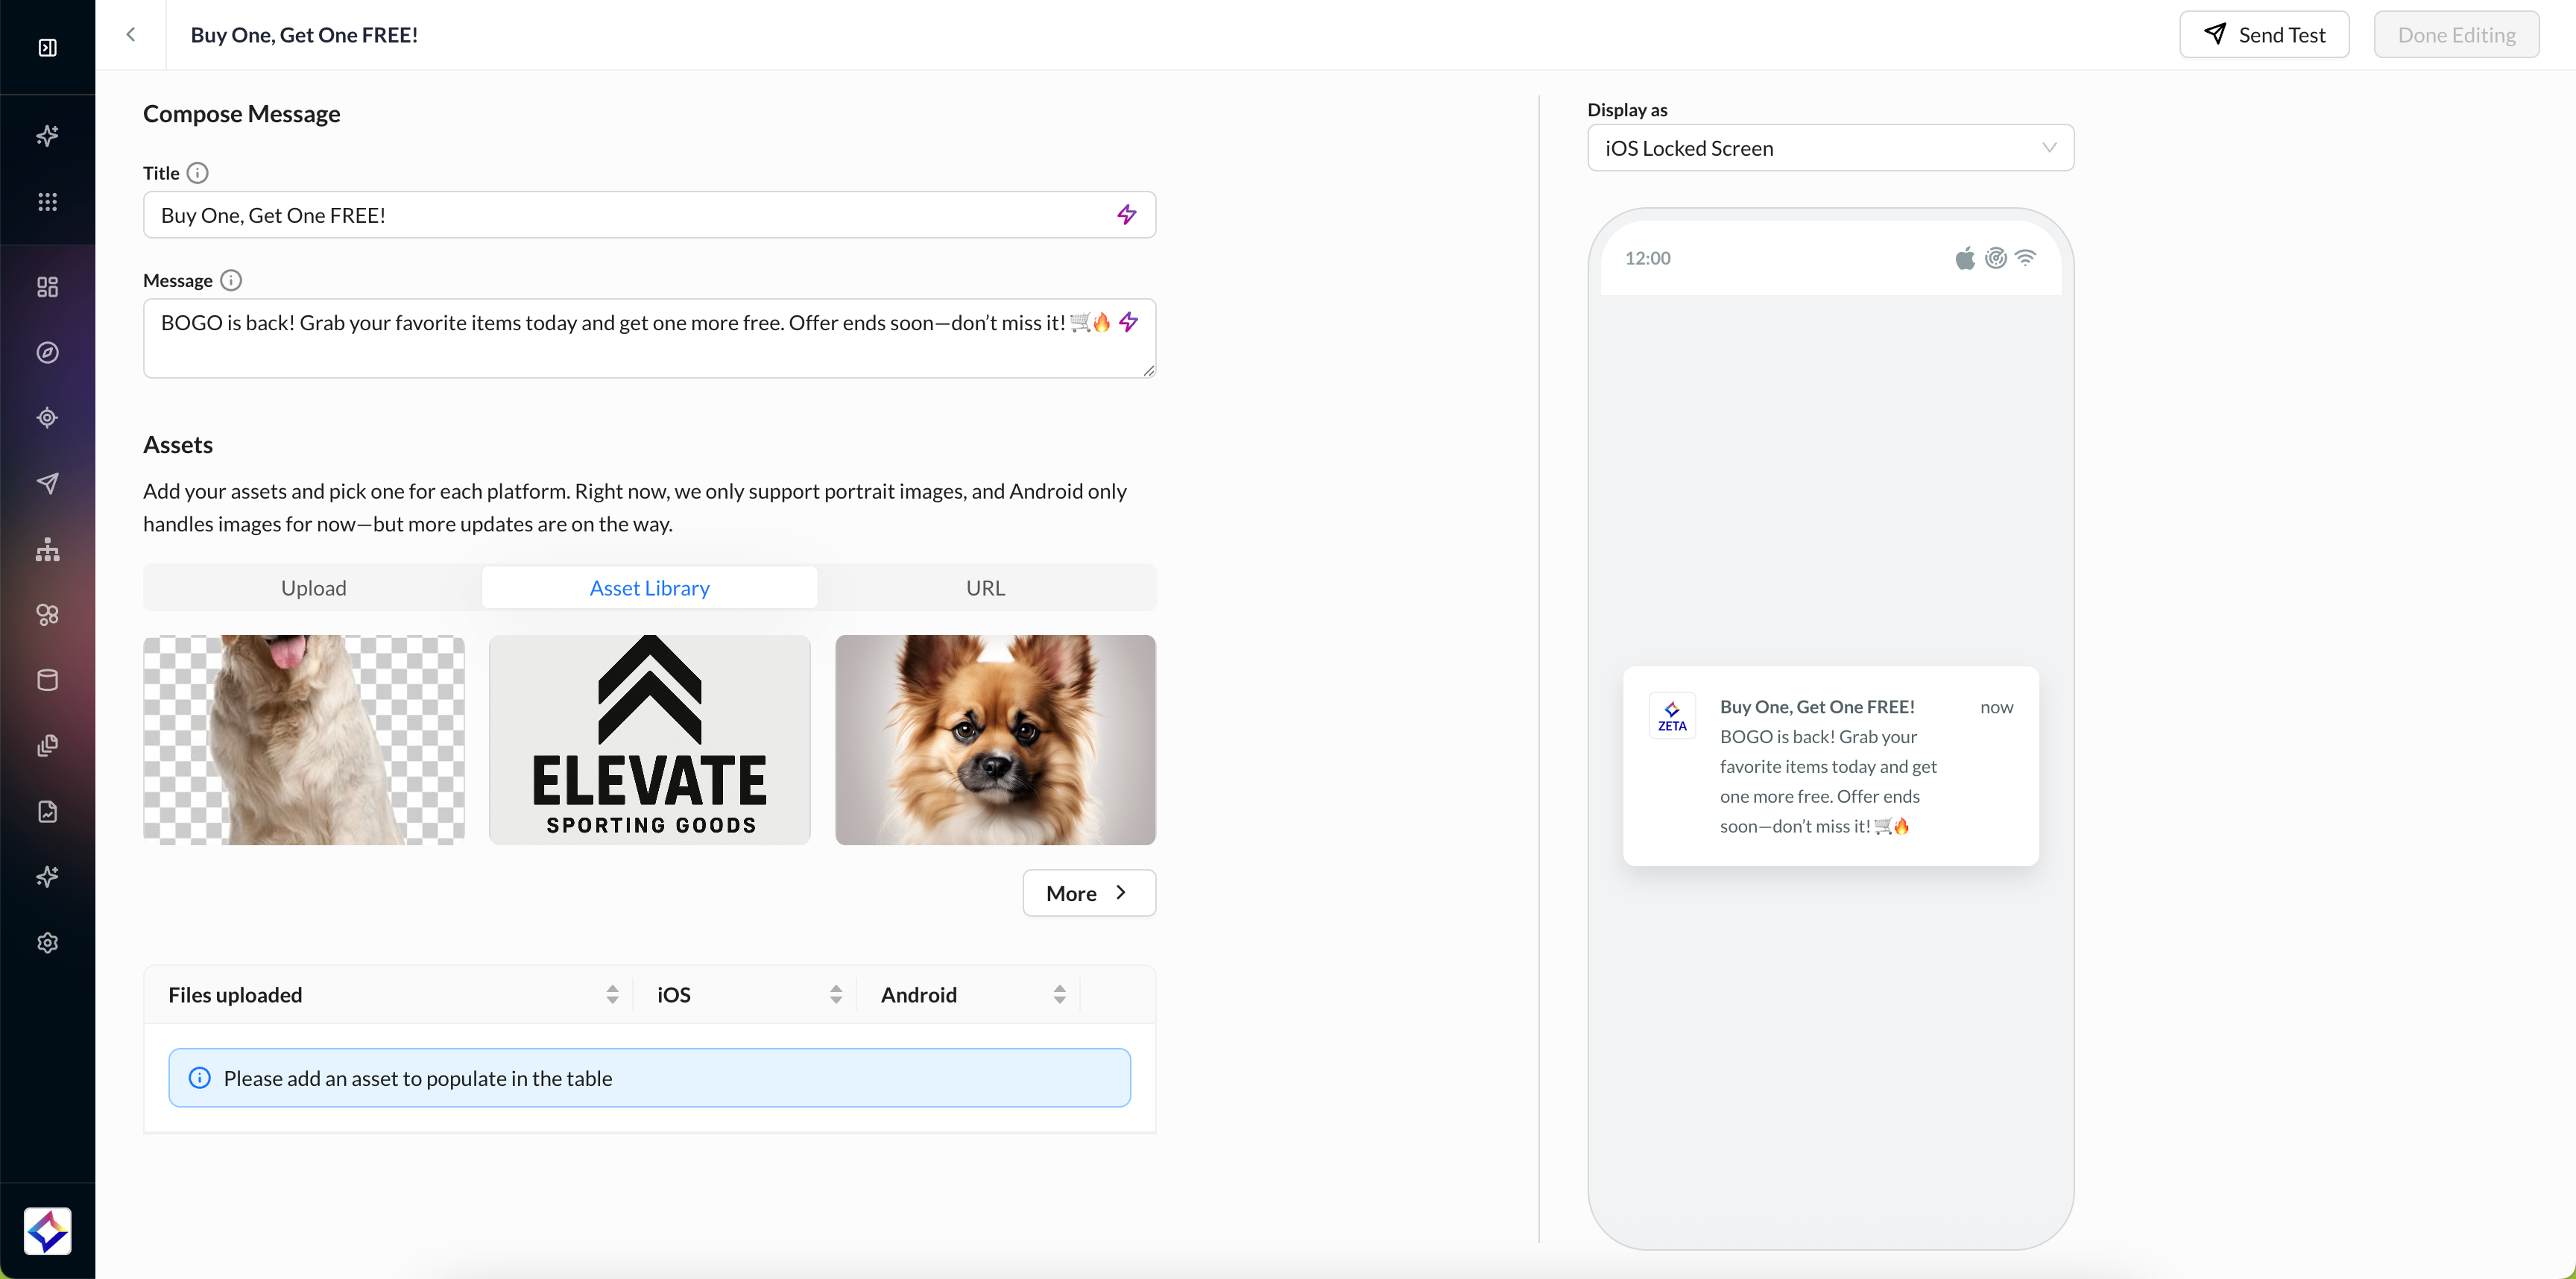
In the campaign editor, configure the notification content:
- Title: the headline that appears in the notification banner. Keep it concise — most devices show fewer than 50 characters before truncating.
- Message: the main message text. On most devices, only the first two lines are visible in the collapsed notification.
- Image (optional): attach a rich media image. Android supports images only; iOS supports images, GIFs, and videos (requires the Notification Service Extension to be integrated by your development team).
- Deep link (optional): a URL that opens a specific screen in your app when the user taps the notification.
- Additional values (optional): custom key-value pairs in the notification payload. See Advanced options.
Personalizing your push
Use dynamic fields in the Title and Body to personalize notifications with individual user attributes — for example, a customer's first name, their most recently viewed product, or their city. Personalized notifications are more relevant and typically drive higher engagement than generic messages.
Dynamic fields are configured using ZMP's tag syntax. For available attributes and personalization options, refer to the ZMP documentation for Broadcast Campaigns or Experience Builder.
Platform-specific settings
ZMP lets you configure settings specific to iOS and Android. Click on iOS/Android options to set platform-specific settings.
iOS settings
| Setting | Description |
|---|---|
| Custom Sound | Choose a custom notification sound or use the system default. |
| Update Badge | Set or update the badge number displayed on the app icon. |
| Group | Set a thread ID to group related notifications into a single notification thread on the device. |
| Button Category | The notification category identifier, used to enable actionable notification buttons (e.g., "Shop Now," "Dismiss"). Requires developer configuration. |
| Interruption level | Controls how the notification interrupts the user: passive (silent delivery), active (default), time-sensitive (breaks through Focus), or critical (overrides mute). |
| Relevance score | A value from 0.0 to 1.0 that indicates the notification's priority when the system groups or summarizes notifications. |
| Deep link | A URL or path that opens a specific screen in your app when the user taps the notification. |
Android settings
| Setting | Description |
|---|---|
| Priority | Notification priority: High, Default, or Low. High priority displays as a heads-up notification. |
| Icon | Custom notification icon resource name from your app. |
| Color | Accent color for the notification icon and action buttons. |
| Collapse key | Groups notifications so only the most recent one in a group is displayed. |
| Sticky | When enabled, the notification persists in the notification shade until the user taps or explicitly dismisses it. |
| Visibility | Controls lock screen behavior: Public (full content visible), Private (content hidden), or Secret (notification hidden entirely). |
| Notification count | Set or update the app's badge count on the launcher icon. |
| Action buttons | Add interactive buttons to the notification (e.g., "View," "Dismiss"). Each button can carry its own deep link or action. |
| Deep link | A URL or path that opens a specific screen in your app when the user taps the notification. |
Audience targeting
Define who receives the push notification:
- Select a segment. Choose an existing audience segment or create a new one in Audience Explorer. See Audience segmentation. Alternatively, navigate to My Customers > Push Contacts to build a segment using push contact data (device tokens) — this works alongside existing user identifiers (BSIN/UID) to precisely target push-enabled users.
- Filter by push eligibility. ZMP automatically filters the segment to include only users with a valid device token and notification permission. Users without push opt-in are excluded.
- Exclude segments (optional). Remove specific user groups from the send.

Note: A device token is an APNS (iOS) or FCM (Android) identifier that represents a specific app installation on a specific device — it is not a user identity. A single user may have device tokens across multiple devices. ZMP uses device tokens to route push notifications to the correct device; user identity is established separately through identifiers such as
uidor email. See Identity resolution. If your push audience is smaller than expected, verify that device tokens are being passed to the SDK correctly.
Launch settings
Configure when and how the campaign is delivered:
- Send immediately: the campaign begins delivery as soon as you activate it.
- Schedule: set a specific date and time for delivery.
- Time zone delivery: send at the specified time in each user's local time zone.
Configure your launch settings and preferences, and activate your campaign.
Advanced options
Notification action buttons
Action buttons let users respond directly from the notification without opening the app — for example, "Shop Now", "Remind me later", or "Dismiss". Each button can carry its own deep link.
- Android — add action buttons in the campaign editor under Android settings. Each button supports a label, deep link, and action.
- iOS — set the Category field in iOS settings to a notification category identifier. This requires your development team to register the corresponding notification category and button definitions in the app. See the iOS Developer Guide.
Frequency capping
Limit how many push notifications a user can receive within a given time period using ZMP's frequency capping controls. See Broadcast Campaigns for configuration details.
Custom data
Additional values are custom key-value pairs you include in the notification payload. Your app can read these to trigger specific in-app behavior, pass attribution data, or personalize the post-tap experience — for example, embedding a product ID so your app navigates directly to the right page.
Note: Additional values are a pass-through mechanism. Your development team's app code is responsible for reading and acting on them. They do not appear in ZMP campaign reports.
Previewing your notification
Before activating, review the notification preview on the right side of the screen in the campaign editor. Check iOS and Android previews — verify title truncation, body text wrapping, and image rendering. Send a test notification to an internal device or test segment to verify end-to-end delivery.
Monitoring delivery
After the campaign launches, track delivery and engagement performance using Report Builder.
Note: ZMP's push-eligible audience reflects only users who have granted notification permission and have a valid device token registered in ZMP. This means the number of users who receive the push will be a subset of your total segment size.
For more on campaign metrics, see Campaign reporting.
See also
- In-app messaging: foreground messages that do not require notification permission.
- App inbox: persistent messages users can revisit.
- Mobile app registration: configuring push credentials in ZMP.
- Push Notifications (iOS Developer Guide): SDK integration details.
- Push Notifications (Android Developer Guide): SDK integration details.