In-app messaging
How to create and manage in-app message campaigns in the Zeta Marketing Platform (ZMP).
This guide covers creating in-app message campaigns in ZMP — from composing and targeting the message, to controlling when it appears and measuring engagement.
On this page
- What you can do with in-app messages
- Before you begin
- Choosing a campaign type
- Composing the message
- On-click actions
- Email collection
- Expiration settings
- Audience targeting
- Activation and scheduling
- Monitoring delivery
What you can do with in-app messages
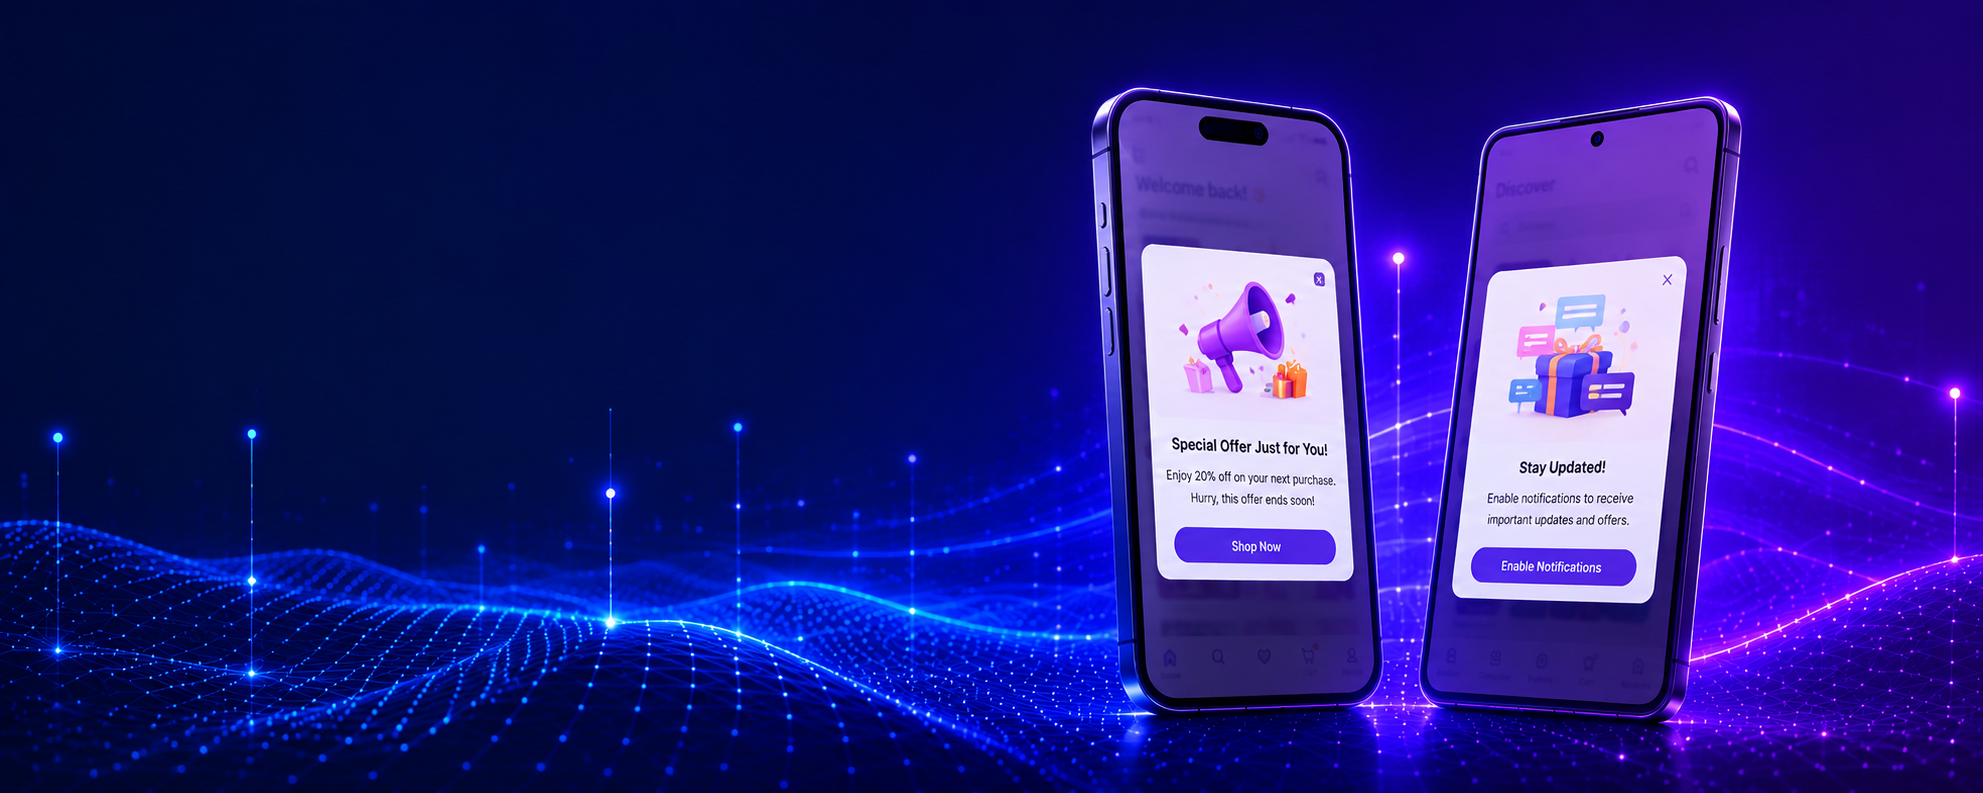
In-app messages are toaster-style messages rendered by the SDK while the user is actively using your app. They do not require notification permission, so deliverability approaches 100% of your active install base. Because they appear in the moment — while the user is engaged — they are well suited to contextual, timely communication.
- Onboard new users — welcome messages, feature walkthroughs, and first-launch tips delivered while the user is exploring your app.
- Drive conversions — targeted promotions, discount offers, or upgrade nudges shown based on audience segment or campaign trigger.
- Re-engage at the right moment — cart reminders, subscription renewal nudges, or limited-time offers surfaced when the user returns to the app.
- Announce features — inform users about new functionality or content without relying on notification permission.
- Capture email addresses — collect contact details from users not yet identified in ZMP with an in-app email submission form.
You can use in-app messages independently or combine them with push notifications, app inbox, and email as part of a multi-channel campaign in ZMP.
Before you begin
Before you can deliver in-app messages, verify the following:
- Your app is registered in ZMP. See Mobile app registration.
- Your development team has integrated the SDK's in-app messaging feature. See the Developer Guides for platform-specific instructions.
No notification permission is required. In-app messages are rendered by the SDK, not by the operating system.
Choosing a campaign type
ZMP supports two ways to send in-app messages. Choose based on whether you want a one-time or scheduled send, or an automated send as part of a multi-channel journey.
Broadcast Campaign
Send a single in-app message to an audience segment, either immediately or at a scheduled time. Best for feature announcements, time-limited offers, and onboarding messages.
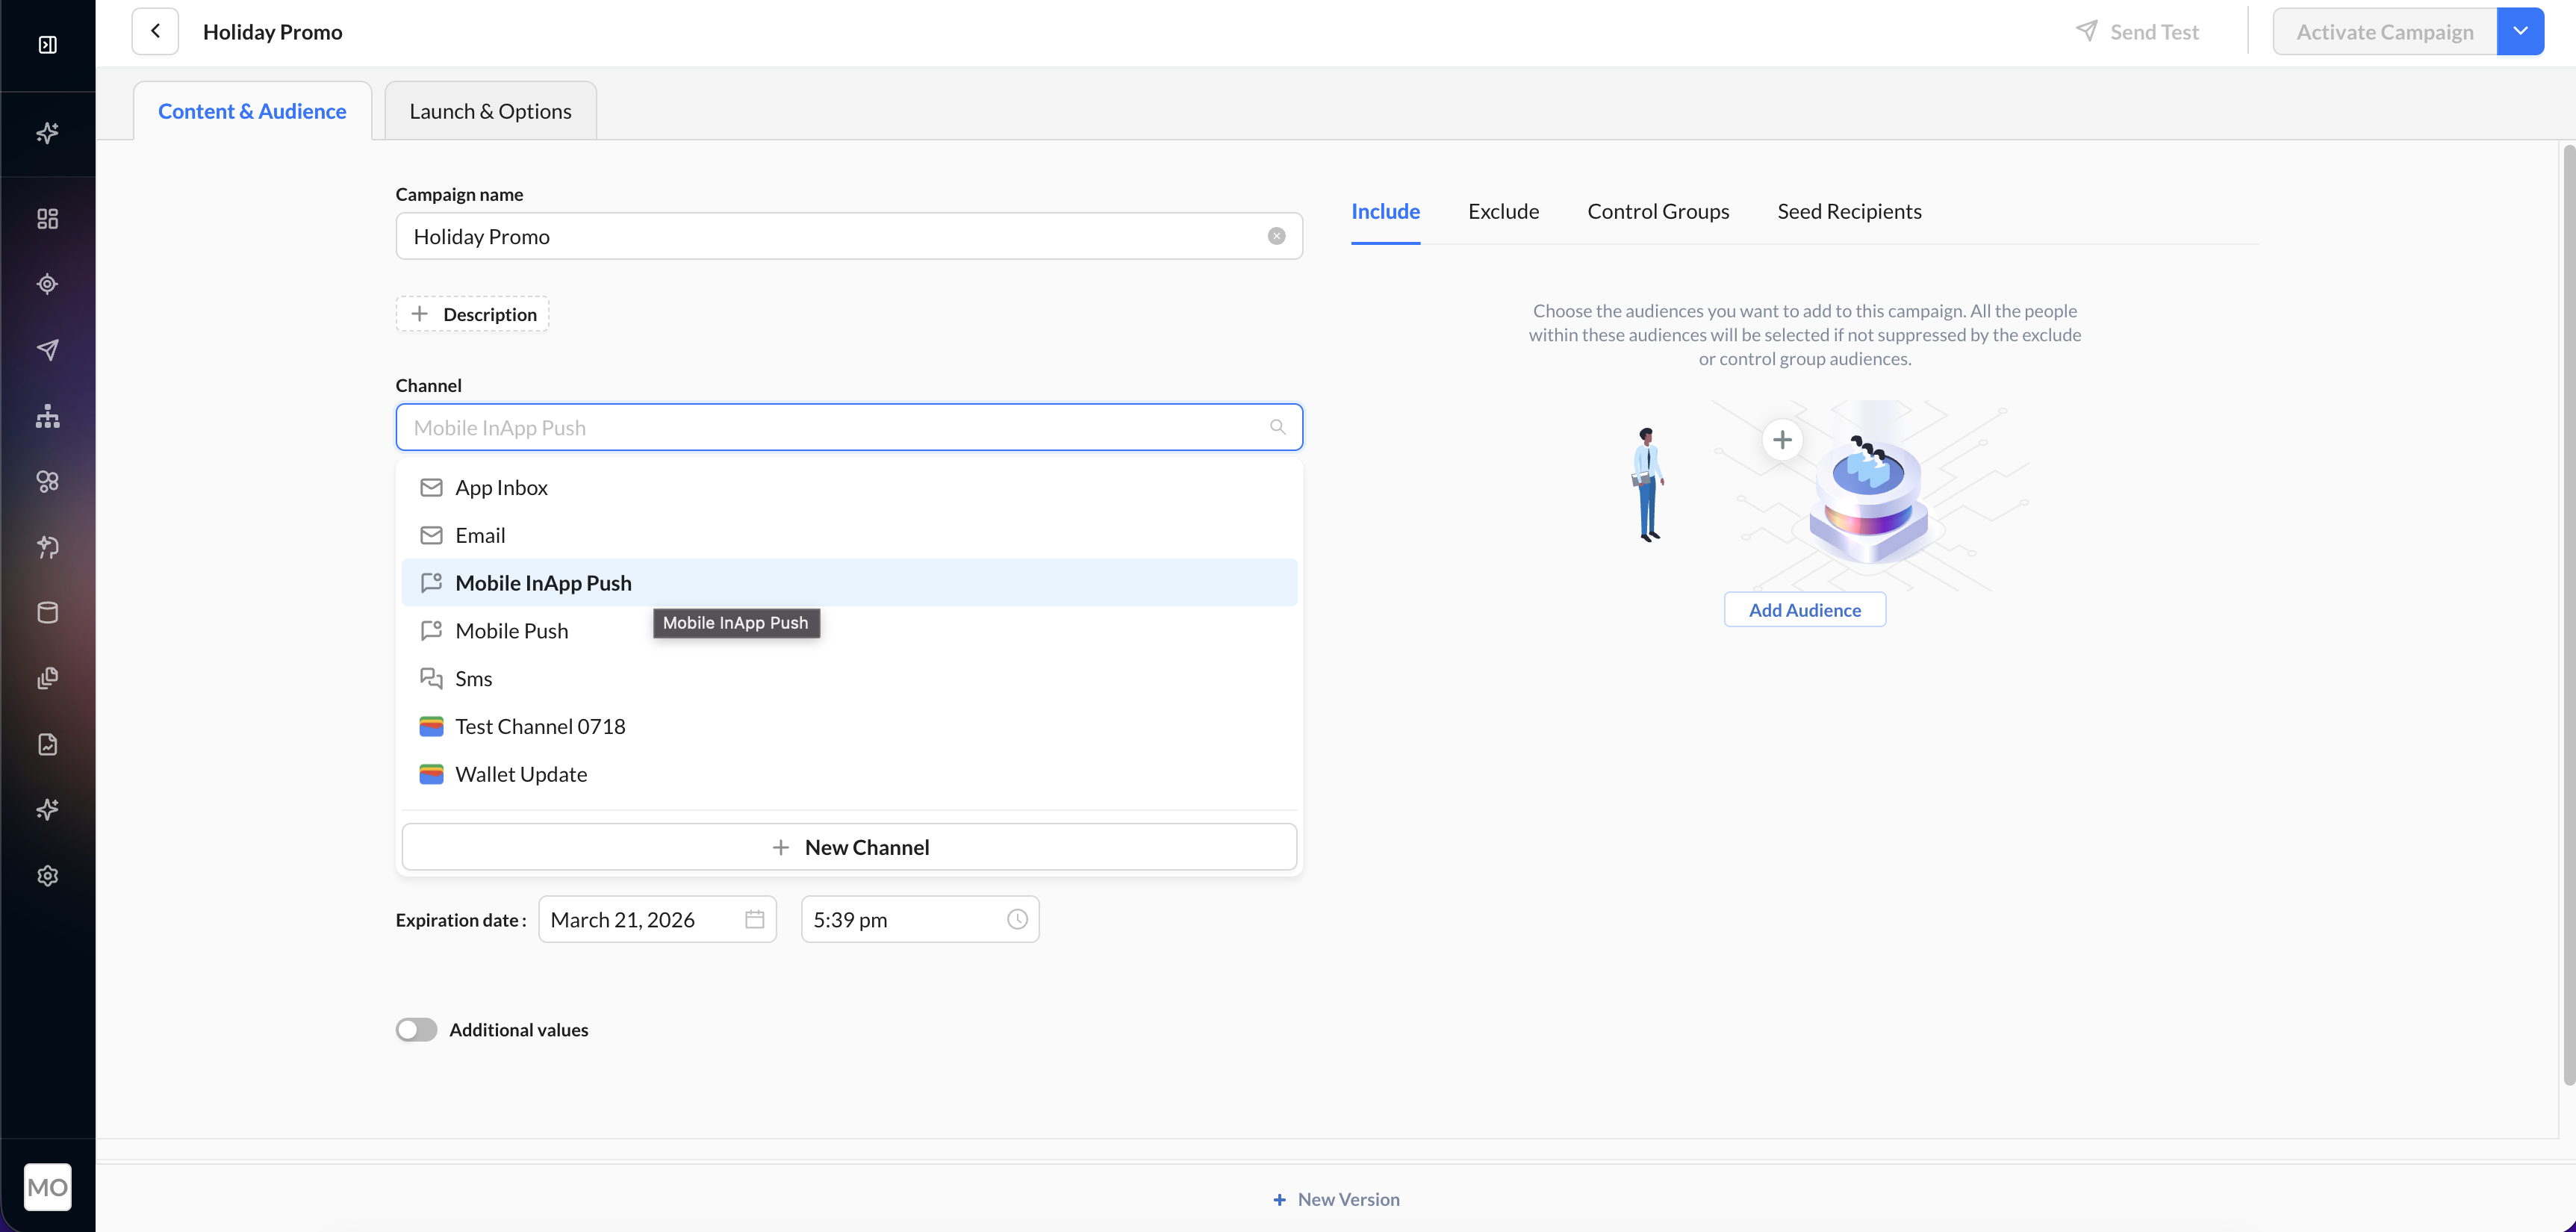
- Navigate to Campaigns > Broadcast from the left-hand menu.
- Click Create Campaign. Enter a campaign name and click Next.
- Within the Content & Audience tab, choose Mobile InApp Push from the channel dropdown.
See Broadcast Campaigns in the Zeta knowledgebase.
Triggered Campaign
Deliver in-app messages as part of an event-triggered, multi-channel journey. Best for behavioral triggers such as post-signup onboarding, inactivity re-engagement, or cross-channel follow-ups after a push notification. Triggered campaigns are configured using Experience Builder.
- Navigate to Experiences > Builder from the left-hand menu.
- Click New Experience to create a new triggered journey.
- Add a Mobile InApp Push step to your journey and configure the trigger.
See Experience Builder in the Zeta knowledgebase.
Note: Unlike push notifications, which are delivered by the device's operating system immediately, in-app messages are fetched by the SDK when the user opens the app. A user who is eligible for an active campaign will see the message the next time they launch the app and meet the targeting criteria.
Composing the message
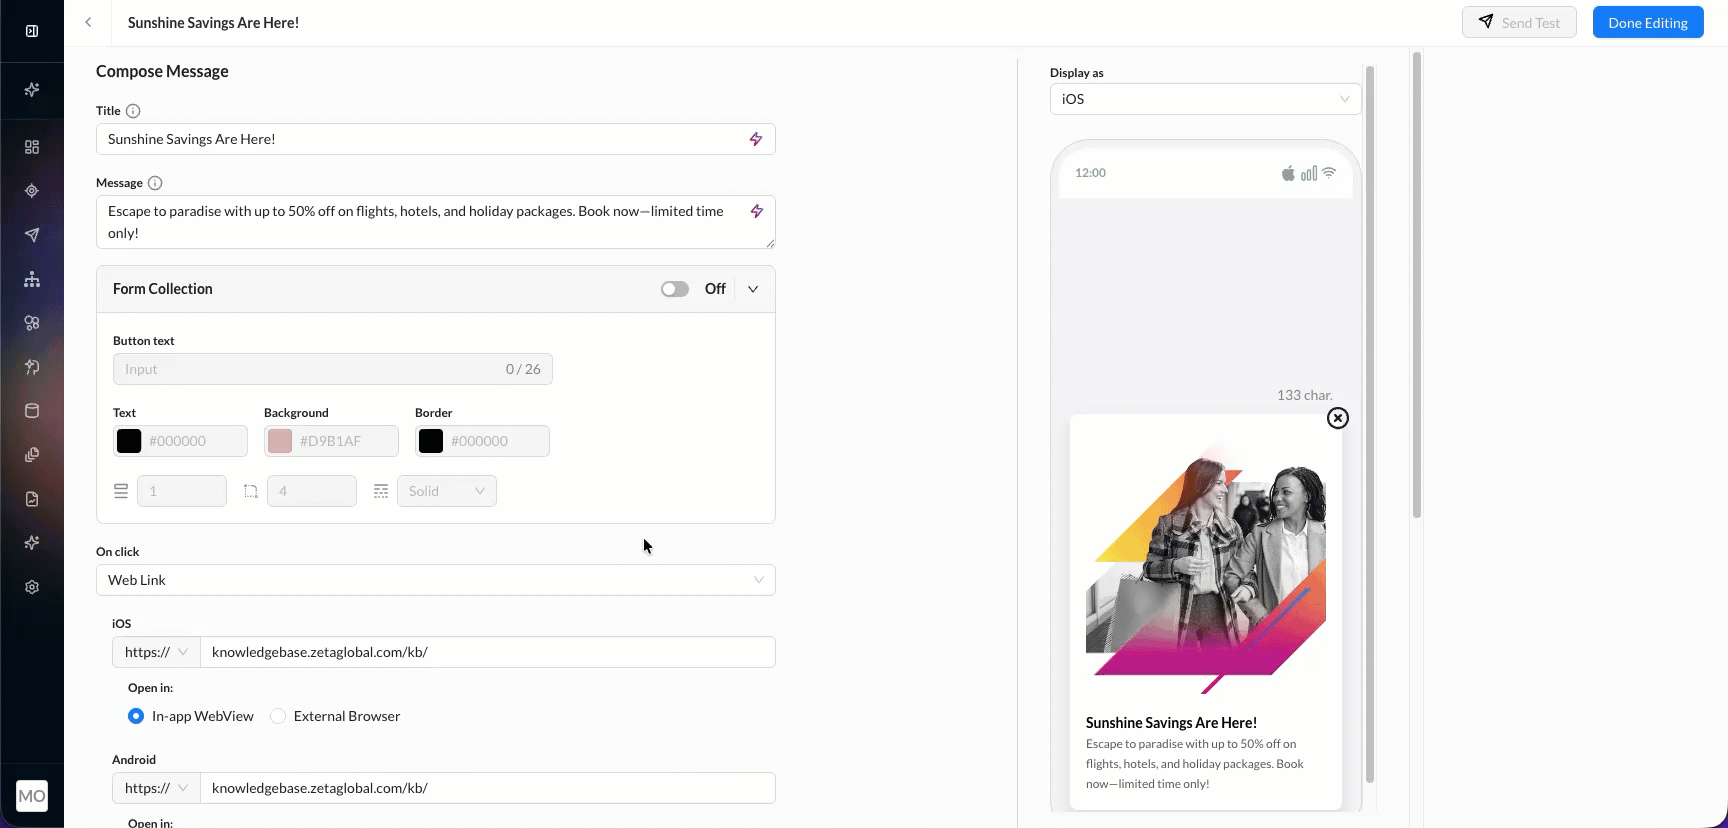
In the content area, click In-App Messaging Setup to configure your message:
-
Title: the headline displayed at the top of the in-app banner.
-
Message: the main message text. Keep it brief — users see the message as a toaster-style overlay while navigating your app. The title and message share a combined character limit of 2,000 characters.
-
Image (optional): a portrait image displayed within the in-app message. Supported formats: JPG or PNG, up to 2 MB.
-
On-click actions: Choose what happens when the user taps the in-app message
Action Behavior Deep link The SDK delivers the deep link URL to your app. Your app handles navigation to the appropriate screen. Dismiss The message is dismissed with no further action. Web link (in-app web view) The URL opens inside the app using a Safari View Controller (iOS) or Chrome Custom Tab (Android). Web link (external browser) The URL opens in the device's default browser.

Personalizing your message
Use ZMP's tag syntax in the Title and Body to insert individual user attributes — for example, a customer's first name, their most recently viewed product, or their city. Personalized messages feel more relevant and tend to drive higher engagement.
For available attributes and tag syntax, refer to the ZMP documentation for Broadcast Campaigns or Experience Builder.
Email collection
In-app email collection lets you capture email addresses from users who are not yet identified in ZMP.
To enable email collection, turn on the Form Collection toggle in the content editor. The Submit button is fully customizable — you can set the button text (e.g., "Sign Up," "Get Started") and match the color scheme to your app's branding.
Key points:
- Email collection only triggers for users who are unknown to ZMP (users without an existing email identifier).
- Users who already have an email in their ZMP profile skip the email collection flow entirely.
- The collected email is available to your development team through the SDK's in-app message delegate callback.
Expiration settings
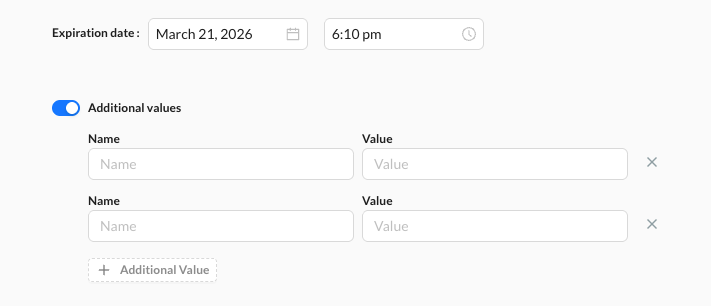
In-app messages can be configured with an expiration:
- Expiration date: set a date and time after which the message is no longer displayed, even if the user has not seen it.
- No expiration: the message remains eligible for display indefinitely (until the campaign is deactivated).
Use expiration for time-bound promotions or announcements that lose relevance after a specific date.
You can also configure optional tracking fields:
- Additional Values (optional): pass up to 10 custom key-value pairs for advanced tracking or personalization.
- External Campaign Codes (optional): associate the message with external campaign identifiers for cross-platform reporting or attribution.
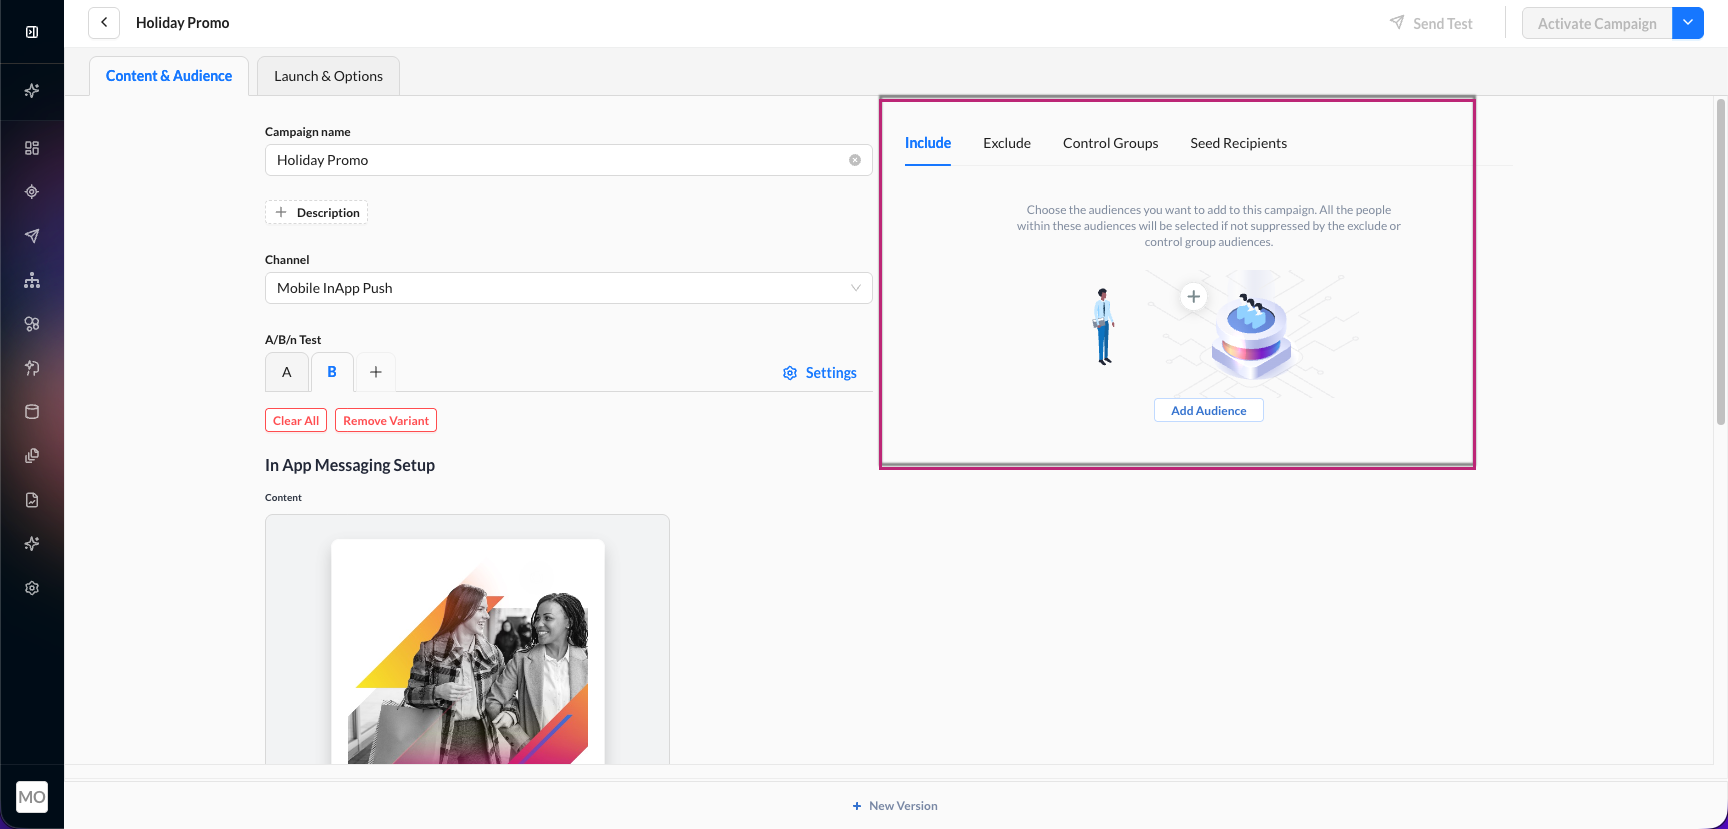
Audience targeting
Define who sees the in-app message:
- Select a segment. Choose an existing audience segment or create a new one. See Audience segmentation.
- All app users: alternatively, target all users who have the SDK installed.
- Exclude segments (optional): remove specific user groups from the target audience.
Unlike push notifications, in-app messages do not require notification permission. Any user with the app installed and the SDK active can receive an in-app message.
Activation and scheduling
Configure when the in-app message campaign is active in the Launch & Options tab:
- Activate immediately: the message begins delivery as soon as you activate the campaign. The SDK will show the message to eligible users the next time they open the app.
- Schedule: set a start date and optional end date for the campaign.
Use the iOS/Android platform preview dropdown in the content editor to see how your message will appear across different devices before activating.
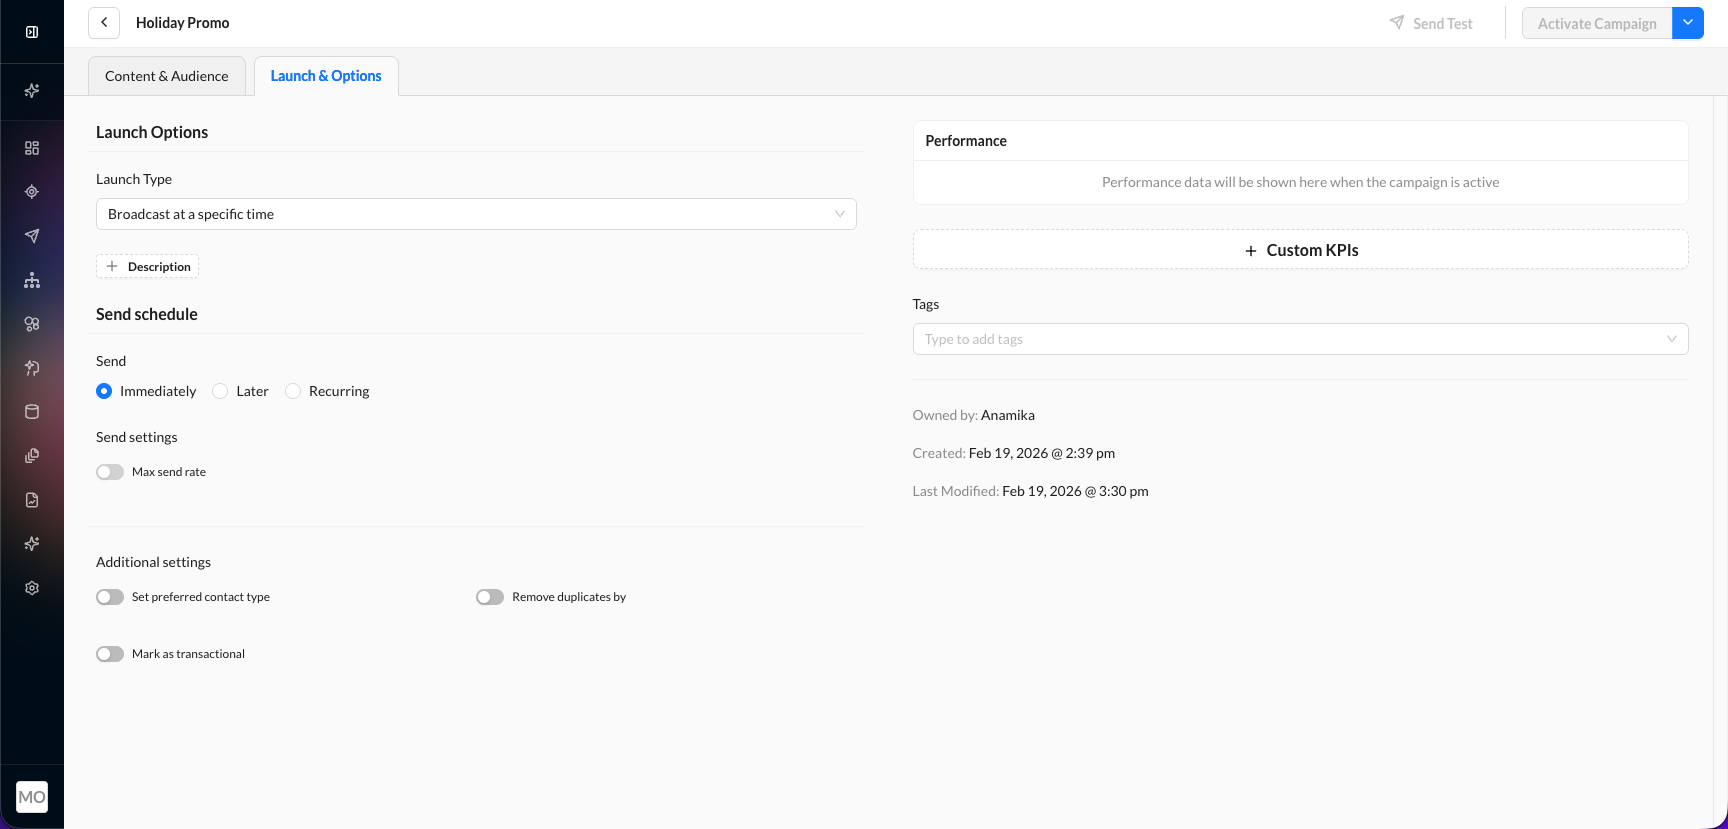
After activation, the SDK polls for new in-app messages and displays them when the app enters the foreground and the user meets the targeting criteria.
Monitoring delivery
Track in-app message performance in the campaign report. For available metrics, see Campaign reporting.
See also
- Push notifications: reaching users outside the app.
- App inbox: persistent messages users can revisit.
- In-App Messaging (iOS Developer Guide): SDK integration details.
- In-App Messaging (Android Developer Guide): SDK integration details.